

How To Add Schema To Wordpress Blog
Do you want to know how to add schema markup to your WordPress website without a plugin?
Schema markup can drastically increase CTR (Click Through Rate) to your site. And proof of that is Jobrapido that added a Job Posting schema markup to their site and got a 270% increase in new user registrations from their organic traffic.
In this post, we'll show you how to add schema markup to WordPress without a plugin, as well as give you a better and easier option to do this.
Please feel free to use the quick links below to jump straight to different sections:
- Is It Best to Add Schema With or Without a Plugin?
- Benefits of Adding Schema Markup
- Add Schema Markup to WordPress Without a Plugin
- An Easier Way to Add Schema Markup to WordPress
But first, let's start by answering the question whether it's best to add schema with or without a plugin.
Is It Best to Add Schema With or Without a Plugin?

Plugins add new functionality to your WordPress site without having to use code. And yet, many users believe that the fewer plugins they use on their sites the better, but that's not always true.
It's true that badly coded plugins could add bloat and slow down your site. But a well-made, lightweight plugin can simplify things and save you a lot of time, without any ill effects. If that didn't convince you, check out WPBeginner's post on how plugins affect your site's speed.
Before we get into things, let's take a look at why adding schema markup without a plugin may not be the best choice for your WordPress site.
- It's Difficult and Time Consuming – not using an SEO plugin to create schema is difficult and takes a lot of extra time. You also need to know how to use PHP code.
- You Can't Update Your Theme – it's never a good idea to edit theme files directly. When the theme updates, all your edits will be gone.
- You Can't Switch WordPress Theme – you can't change your WordPress theme since your custom code will only work if you're using that particular theme.
- You'll Miss Out on Powerful Features – with a powerful SEO plugin like AIOSEO, you can easily include advanced markups such as Articles, Breadcrumbs, and Sitelinks Search Box.
With that said, let's take a closer look at the benefits of schema markups and how they can improve your CTR (Click Through Rate).
Benefits of Adding Schema Markup
The benefits of adding schema markup to your WordPress site are many. For instance, you've probably seen those nice looking search results with star ratings and prices like this example:

These are called rich snippets, and you get them by adding schema markup to your web pages. They give direct information to users about what a page is about and make it look better in search.
With other words, schema markups are used by all big search engines like Google, Bing, Yahoo, and Yandex to show additional information in their search results.
Also, rich snippets increase the CTR to your site since they make your content look more visually appealing when displayed in search engines.
And more clicks will eventually lead to higher rankings as well. It's a great way of boosting your SEO and get more organic traffic.
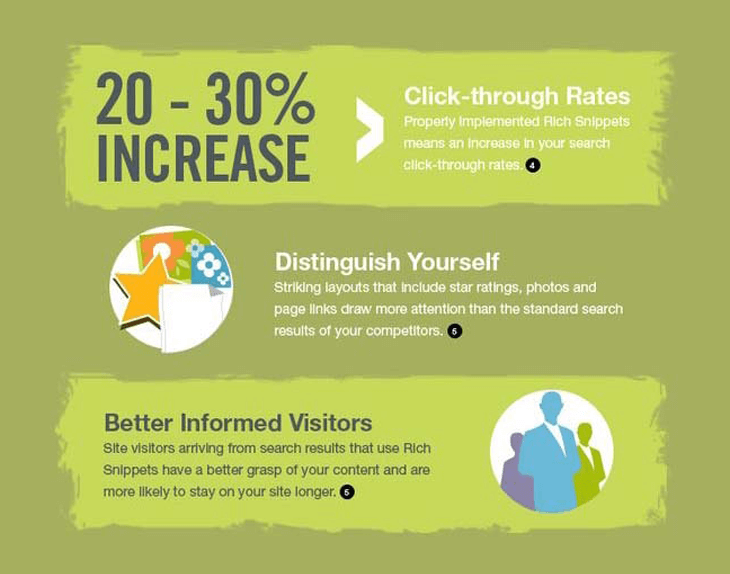
Image Source: Brandon Gaille
Difference Between Rich Snippets and Schema Markup
Wait a second, we're talking about rich snippets and schema markup like they're the same?
Not quite! Let's explain the difference between the two. Simply put, while rich snippets are for humans, schema markups are for search engine bots.
Schema markup is the code that tells Google what your content is about. And rich snippets are what Google displays in search results.
It's also referred to as structured data since it uses a code language accepted by major search engines.
You can add schema markup to:
- Articles
- Events
- Reviews
- Recipes
- Books
- Products
- FAQs
- And much more
Anyhow, there are two ways to add schema markup to your site. The best and easiest method is by using the best and most powerful SEO plugin in the market, AIOSEO. We'll show you how easy this is in section: an easier way to add schema markup to WordPress.
The second way is to add it manually without a plugin, and that's what we're going to show you how to do next.
Add Schema Markup to WordPress Without a Plugin
To start with, you can visit Schema.org to find the markup you want to add to your content. We'll show you how to add the Article markup to your WordPress site. But you can find all schema markups that are supported by search engines on Schema.org.
These markups are using 3 different code languages:
- Microdata
- RDFa
- JSON LD
We're going to use JSON–LD since Google likes it better and it doesn't break your site as easily as other markups can do.
With that said, let's take a look at how to add Article markup on your post or page in WordPress using the block editor.
WordPress Block Editor
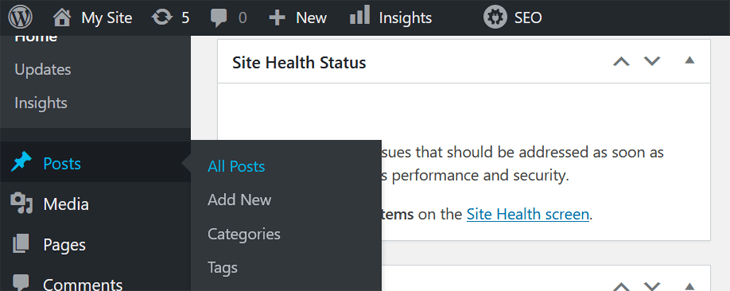
To get started, simply log in to your WordPress Dashboard and navigate to any Post or Page you want to add schema to.
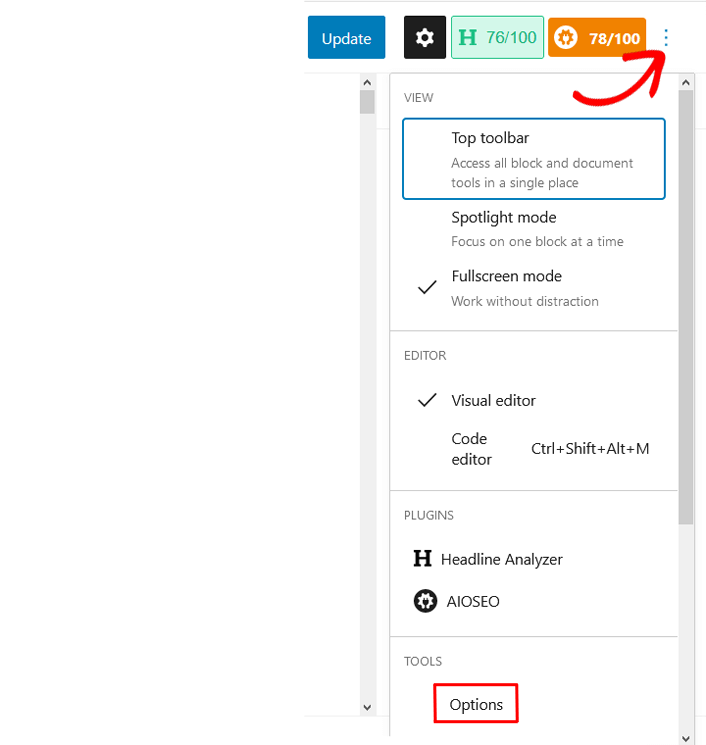
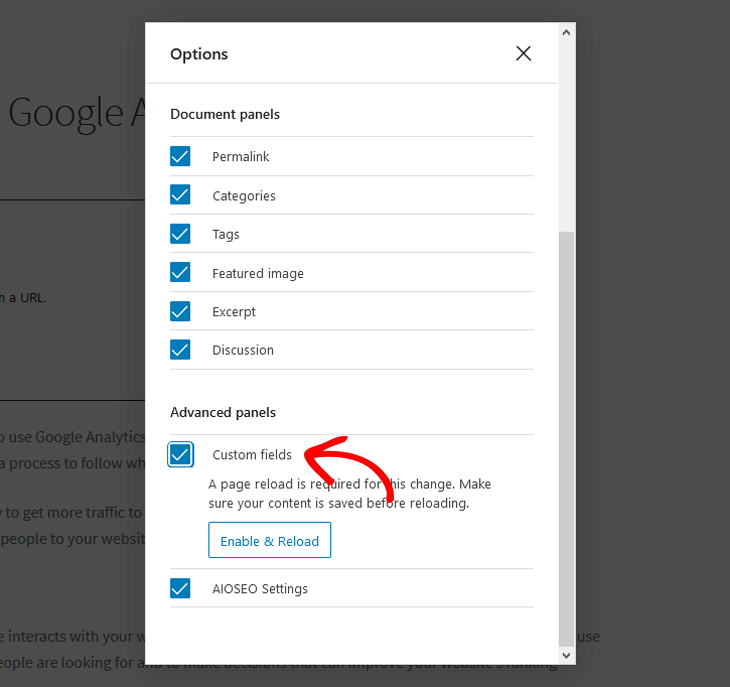
Next, you need to make sure that Custom Fields are checked in the Options tab. Click on the 3 dots in the top right corner, and it will open a new view. Then, scroll down to Options in the Tools section.
This will open a new window with all panel options. Here you need to check the Customs Fields box.
After that, you simply return to the block editor and scroll down in your post or page to the bottom, where you can see the Custom Fields settings.
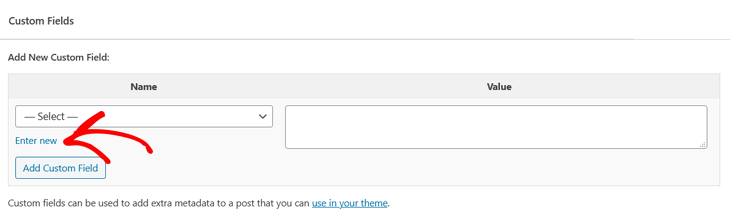
In Add New Custom Field, you click on the Enter new tab.
The next step is to Name your schema markup. In this example, we've named it Article Schema since we'll add a markup for article.
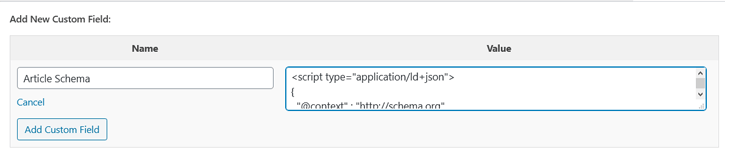
Once you've named your markup, you'll need to copy the code snippet below and paste it in the Value section. If you haven't written code before but want to use a different markup, you can use the Google Structured Data Markup Helper or Schema Markup Generators. They will generate the code for you.
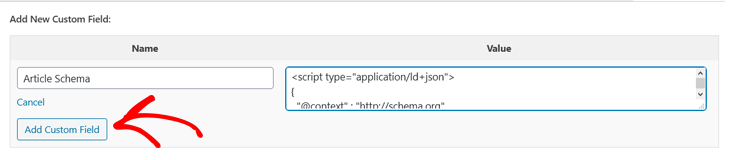
<script type="application/ld+json"> { "@context": "https://schema.org", "@type": "NewsArticle", "mainEntityOfPage": { "@type": "WebPage", "@id": "https://google.com/article" }, "headline": "Article headline", "image": [ "https://example.com/photos/1x1/photo.jpg", "https://example.com/photos/4x3/photo.jpg", "https://example.com/photos/16x9/photo.jpg" ], "datePublished": "2015-02-05T08:00:00+08:00", "dateModified": "2015-02-05T09:20:00+08:00", "author": { "@type": "Person", "name": "John Doe" }, "publisher": { "@type": "Organization", "name": "Google", "logo": { "@type": "ImageObject", "url": "https://google.com/logo.jpg" } } } </script> After you've added the code in Value, click on the Add Custom Field button. Then, scroll up to the top of the page and click on Update to save your changes.
You're almost finished.
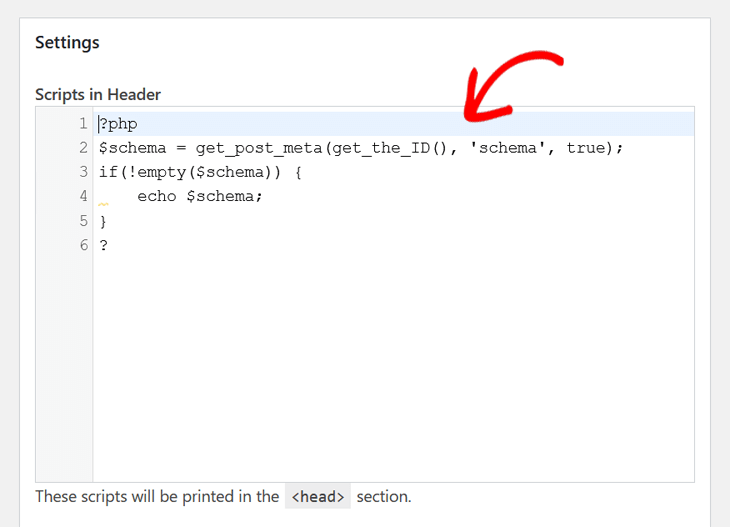
The last step is to copy this code snippet and add it to your header.php file:
<?php $schema = get_post_meta(get_the_ID(), 'schema', true); if(!empty($schema)) { echo $schema; } ?> We'll show you how to do that next.
Note: We need to warn you that one single mistake when editing theme files can bring your whole website down and cause the white screen of death. Always make sure to backup your site before you start.
Safely Add Custom Code to Your Header.php File
The best and safest option is always to use a plugin to add custom code and functionality to your site. And we strongly recommend using the Insert Headers and Footers WordPress plugin.
So before we show you how to directly edit the theme files, we'll show you how easy it is to add your code snippet to the header.php file using the Insert Headers and Footers plugin.
After installing and activating the plugin, you simply navigate to your WordPress Dashboard and click on Insert Headers and Footers in the Settings menu.
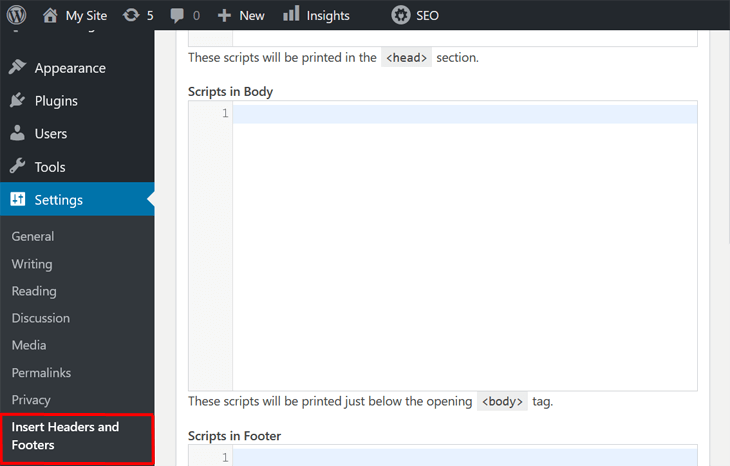
Here you'll see different windows for adding your code to the Header, Body, and Footer of your site. Make sure to add your code snippet in the Scripts in Header window.
Click on the Save button, and that's it!
It can't get much easier than that! Best of all, it's much safer than editing the theme files directly.
Add Custom Code Directly in Your Theme Files
With that said, let's move on to how to add the code snippet directly in the theme editor and header.php file.
Simply go to Appearance » Theme Editor and click on the header.php file in Theme Files.
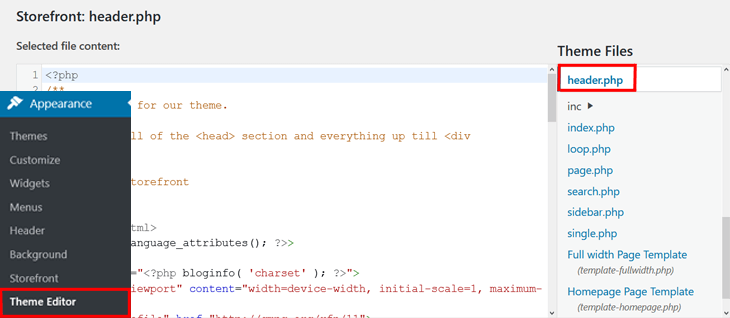
This will open a new window, where you can edit the file.
Now, paste in the schema code in the file editor just before the </head> tag.
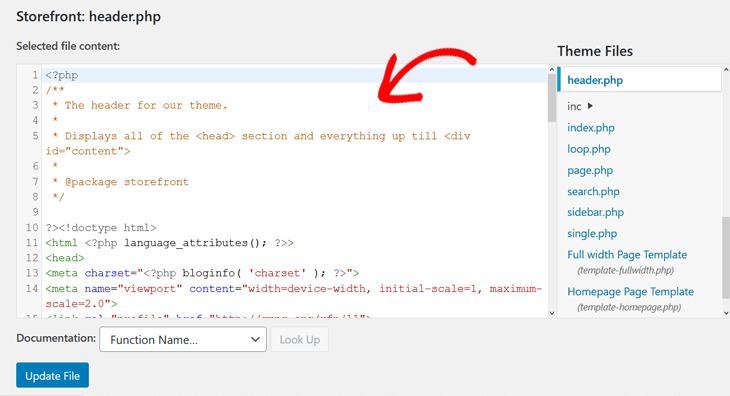
After you've added the code snippet, click on the Update File button.
Finally, reload your page and you'll see the schema markup just before the closing tag.
You have now successfully added schema to WordPress without a plugin, and can test your URL to check if there are any errors using Google's Structured Data Testing Tool.
Now that you know how to add schema without a plugin, we'll show you a better and easier way to add schema markup to your WordPress website.
An Easier Way to Add Schema Markup to WordPress

There's a better and easier way to add schema markup to your site using the most powerful WordPress SEO plugin, All in One SEO (AIOSEO).
Not to mention, many other advanced SEO tools that will improve your SEO and increase rankings in search engines.
Here are some of these powerful SEO tools:
- SEO Custom User Roles — allow you to manage access to important SEO features without handing over control of your website.
- SEO Audit Checklist — analyze your entire WordPress site to detect critical errors and get actionable insights to boost your SEO and get more traffic.
- Smart XML Sitemaps — automatically generate a WordPress XML sitemap and notify all search engines of any updates.
- Google News Sitemap — get higher rankings and unlock more traffic by submitting your latest news articles to Google News.
Now that you know a few of AIOSEO's advanced SEO tools, let's take a look at what you can add schema to.
You can add schema to:
- Articles
- Breadcrumbs
- Sitelinks Search Boxes
Note: Breadcrumb and Sitelinks Search Box schema markups are sent automatically to search engines. As well as Corporate Contacts and Organization Logos that are sent to Google's Knowledge Graph.
To get started adding schema, you first need to install and activate AIOSEO on your WordPress website. If you haven't installed a plugin before, you can check out WPBeginner's guide on how to install a WordPress plugin.
Now that you've installed AIOSEO, we'll show you how to set if you're a person or organization so that you can tell Google about your business.
Add Person or Organization
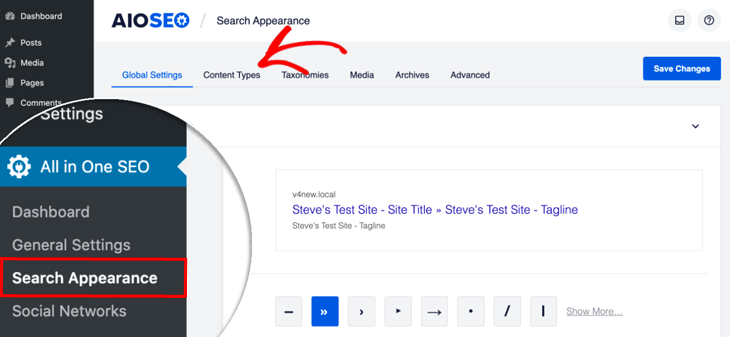
In the All in One SEO menu, click on Search Appearance. Next, go to the Global Settings tab and scroll down to the Schema Markup section.
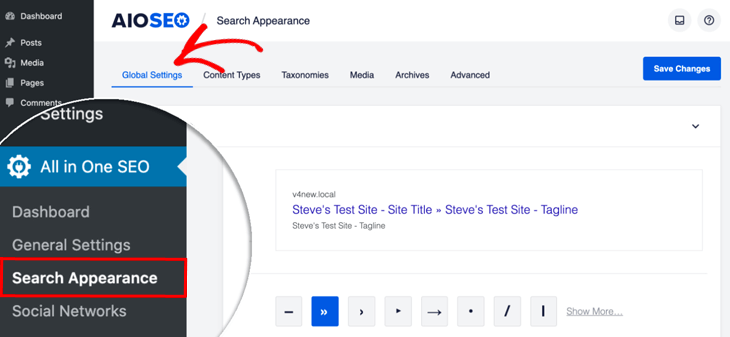
The first thing you need to do is choose whether your site represents a Person or Organization.
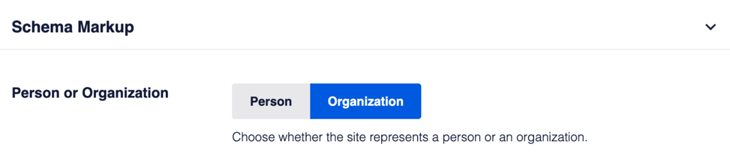
Based on what you choose, you'll see fields where you need to enter your information.
For Organization, you need to enter the following information:
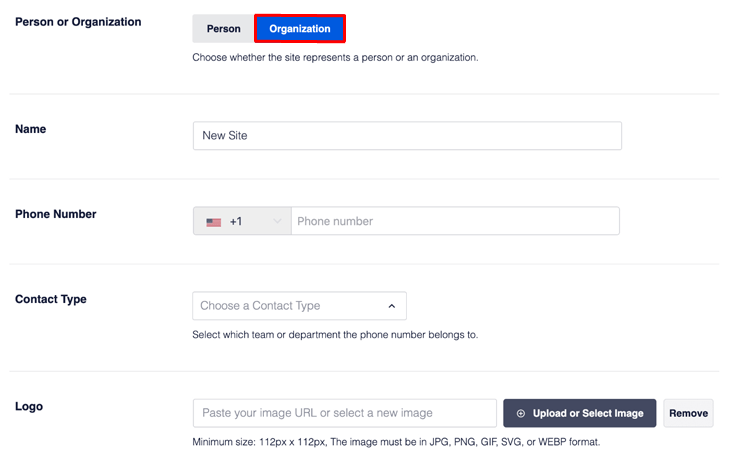
- In the Name field – enter the name of your organization or business
- In the Phone Number field – enter the phone number for your business you'd like listed on search engines
- In the Contact Type field – select what type that best describes the Phone Number you entered
- In the Logo field – upload the logo for your organization or business
Note: The image has to be a minimum size of 112px x 112px and in jpg, png, or gif format. Also, if you don't upload a logo, AIOSEO will use the logo that you added to your theme.
If you have a Personal site, you need to enter this information:
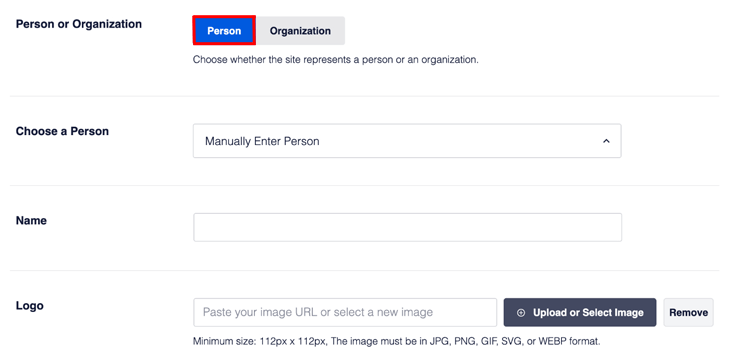
- In the Choose a Person field – choose the primary owner for your site from the list of users. Only users with the role of Author, Editor, or Administrator will be listed here
- You can also select the Manually Enter Person option from the drop down and then complete the Name and Logo fields
- In the Name field – enter the name of the primary owner for your site
- In the Logo field – upload an image of the primary owner (the same size requirements as for organization)
Let's move on to enabling sitelinks search box for your site.
Enable Sitelinks Search Box
A sitelinks search box is a quick way for people to search your site directly from the search results on Google.
Here's an example of a sitelinks search box for Pinterest:
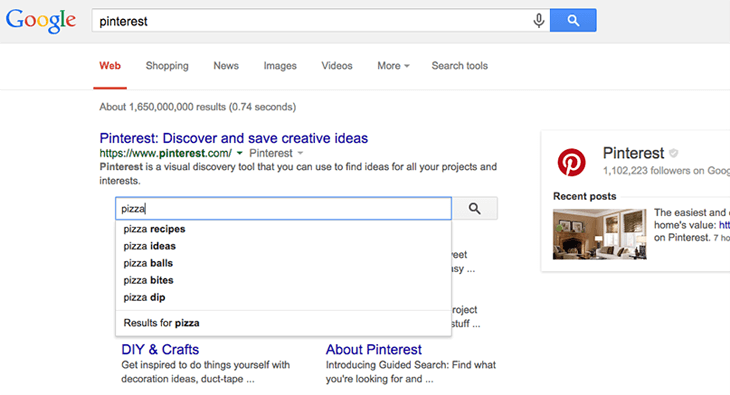
Image Source: Google Search Central
In Enable Sitelinks Search Box, make sure that the button is set to on.

AlOSEO will then send the code for the sitelinks search box so that Google can show it in search results.
Now that you've completed the main schema markup settings, we'll move on to adding schema to your content.
Adding Schema to Your Content
To start with, you need to navigate to the All in One SEO menu and click on Search Appearance. The next step is to click on the Content Types tab.
Here you'll see sections for each of the types of content on your site such as posts, pages, and products.
We'll add schema to Post types for your site. While in Posts, click on the Schema Markup to set schema for your Schema Type and Article Type.
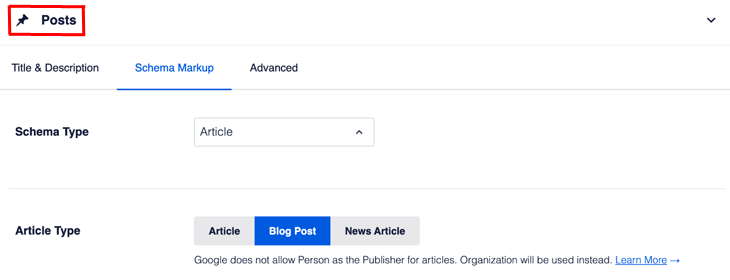
Make sure you have Article as Schema Type. It's the best option for blog posts and news articles.
Below Schema Type, you'll see a setting for Article Type. It's set to Blog Post by default, but you can choose what fits your content the best.
You can repeat these steps for pages and products too.
Add Schema to Your Taxonomies
Now that you know how to add schema to your content, we'll move on to taxonomies.
In the All in One SEO menu, click on Search Appearance and then the Taxonomies tab.
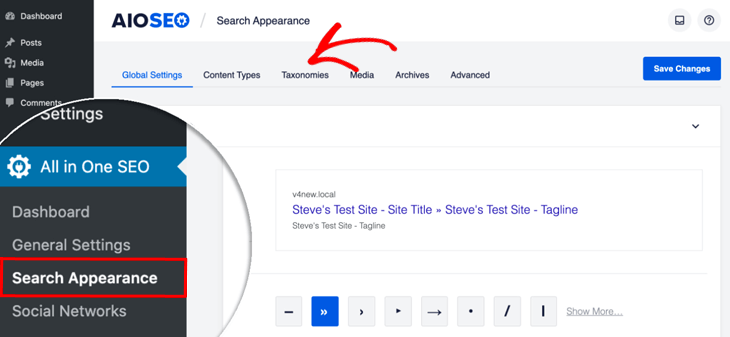
Like in the schema settings for posts, you'll see sections for each of the taxonomies for the content on your site such as categories, tags, etc.
Simply, click on the Schema Markup tab in each section to configure Schema for that taxonomy. In this example, we'll show you how to add schema to Categories.
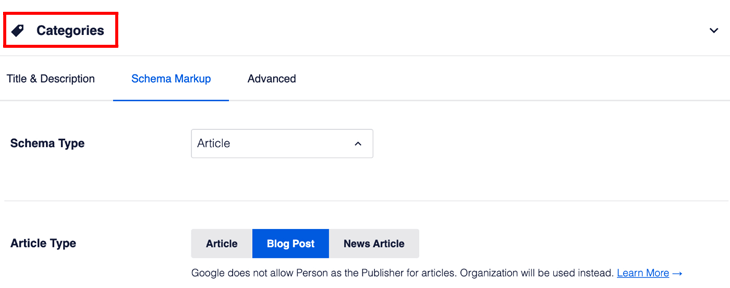
Here you can choose your Schema Type and Article Type, just like you did for posts. Then, repeat this process for your other taxonomies.
The last step is to set schema type for your individual content.
Add Schema to Your Individual Posts and Pages
You can also add schema markup directly in the editor for your blog post or page.
Simply scroll down to the AIOSEO Settings at the bottom of your post or page, and click on the Schema tab. This will open a new window, where you can select Schema Type.
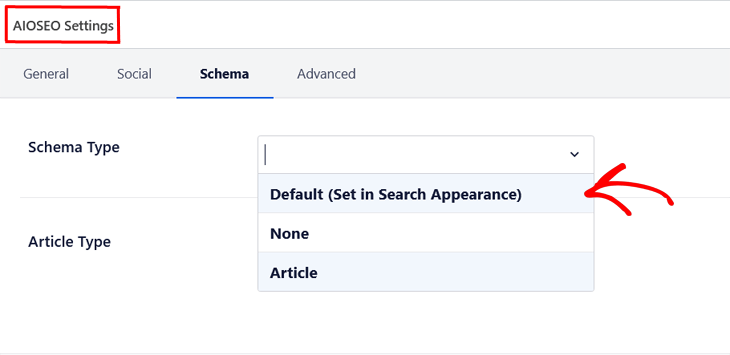
Use the drop-down to set the Schema Type for your post or page. If you choose the Default (Set in Search Appearance) option, AIOSEO will use your prior settings in Search Appearance.
The final step is to choose Article Type for your content.

As you can see, Blog Post is set as the default option, but you can choose whichever you feel best fits your content.
That's all!
You've now set schema markup on individual posts or pages.
We hope this blog post helped you learn how to add schema markup to your WordPress website without a plugin. And also showed you a better and easier way to add schema markup to your site without having to use PHP code.
One last thing before you go!
If you want to learn how to optimize your blog post for SEO like a pro, make sure to check out our blog post SEO checklist or ultimate WordPress SEO guide.
Stay tuned for AIOSEO's new features and improvements.
As always, thanks for supporting the best SEO plugin for WordPress.
How To Add Schema To Wordpress Blog
Source: https://aioseo.com/add-schema-markup-to-wordpress-without-a-plugin/
Posted by: harristheadis.blogspot.com
0 Response to "How To Add Schema To Wordpress Blog"
Post a Comment